Posts in Category: Technology

  • Web3 Identity and Authentication Systems for Modern Web Applications

    Web3 Identity and Authentication Systems for Modern Web Applications

    Web3 identity systems are revolutionizing how users authenticate and interact with web applications, moving beyond traditional centralized authentication toward decentralized, user-controlled identity solutions. By leveraging blockchain-based identity protocols, developers can create more secure, privacy-focused authentication experiences.

    Start with Web3Auth, an open-source authentication service that connects web applications with multiple blockchain networks and social login providers. This approach allows users to sign in using their existing crypto wallets, social accounts, or DID documents without revealing personal information.

    The key advantage is true user control—users maintain ownership of their identity data and can grant or revoke access permissions at will. This eliminates centralized password databases vulnerable to hacks while providing a seamless user experience that doesn’t compromise on security.

    Implement Web3 authentication gradually: begin with email + password, add social login, then integrate Web3 options. This ensures existing users aren’t locked out while providing forward-looking users with cutting-edge authentication options.

  • Progressive Enhancement Strategies: Building Better Web Applications

    Progressive Enhancement Strategies: Building Better Web Applications

    Progressive Enhancement is a web development strategy that prioritizes functionality and accessibility across all browsers and devices, starting from the baseline and progressively adding advanced features.

    Why Progressive Enhancement Matters

    In today’s diverse web landscape, users access websites through various browsers, devices, and connection speeds. Progressive Enhancement ensures your site works for everyone, not just those with the latest technology.

    Core Principles

    Start with HTML

    Begin with semantic HTML that provides the basic content and structure of your page. This ensures that even users with disabled CSS or JavaScript still get meaningful content.

    Enhance with CSS

    Apply styles to improve the visual presentation and layout. Use CSS features that gracefully degrade on older browsers, ensuring the core experience remains intact.

    Add JavaScript Interactions

    Use JavaScript to add dynamic behavior and interactivity. Ensure that functionality degrades gracefully when JavaScript is unavailable, maintaining access to core features.

    Progressive Enhancement in Action

    Forms and User Input

    Start with basic HTML forms for data collection. Enhance with CSS for better styling and validation UI. Add JavaScript for advanced validation, autocomplete, and user experience improvements.

    Navigation and Content Structure

    Build navigation with semantic HTML for accessibility. Enhance with CSS for responsive design and visual improvements. Add JavaScript for smooth interactions and progressive loading of content.

    Media and Rich Content

    Embed images and videos with basic HTML tags. Enhance with CSS for responsive sizing and lazy loading. Add JavaScript for interactive galleries and adaptive quality based on connection speed.

    Benefits of Progressive Enhancement

    Universal Access

    Ensures your site works for all users, regardless of their technology stack or abilities.

    Performance and Speed

    Delivers core content quickly, with enhancements loading progressively as resources become available.

    SEO Advantages

    Search engines can easily crawl and index your content from the base HTML structure.

    Maintainability

    Simpler core structure makes code easier to understand, test, and maintain.

    Implementing Progressive Enhancement

    Testing Your Implementation

    Use browser development tools to simulate different environments and test how your enhancements degrade.

    Performance Monitoring

    Track how quickly users can access core content and monitor the loading of enhanced features.

    Accessibility Validation

    Ensure your base implementation meets WCAG guidelines and test with assistive technologies.

    Modern Tools and Frameworks

    Many modern frameworks support Progressive Enhancement out of the box. Consider using feature detection and graceful degradation techniques when integrating these tools.

    By embracing Progressive Enhancement, you create resilient web applications that serve all users effectively while providing rich experiences for those with modern technology.

  • Web Packaging and Module Federation: Modern Frontend Architecture for Code Sharing and Performance

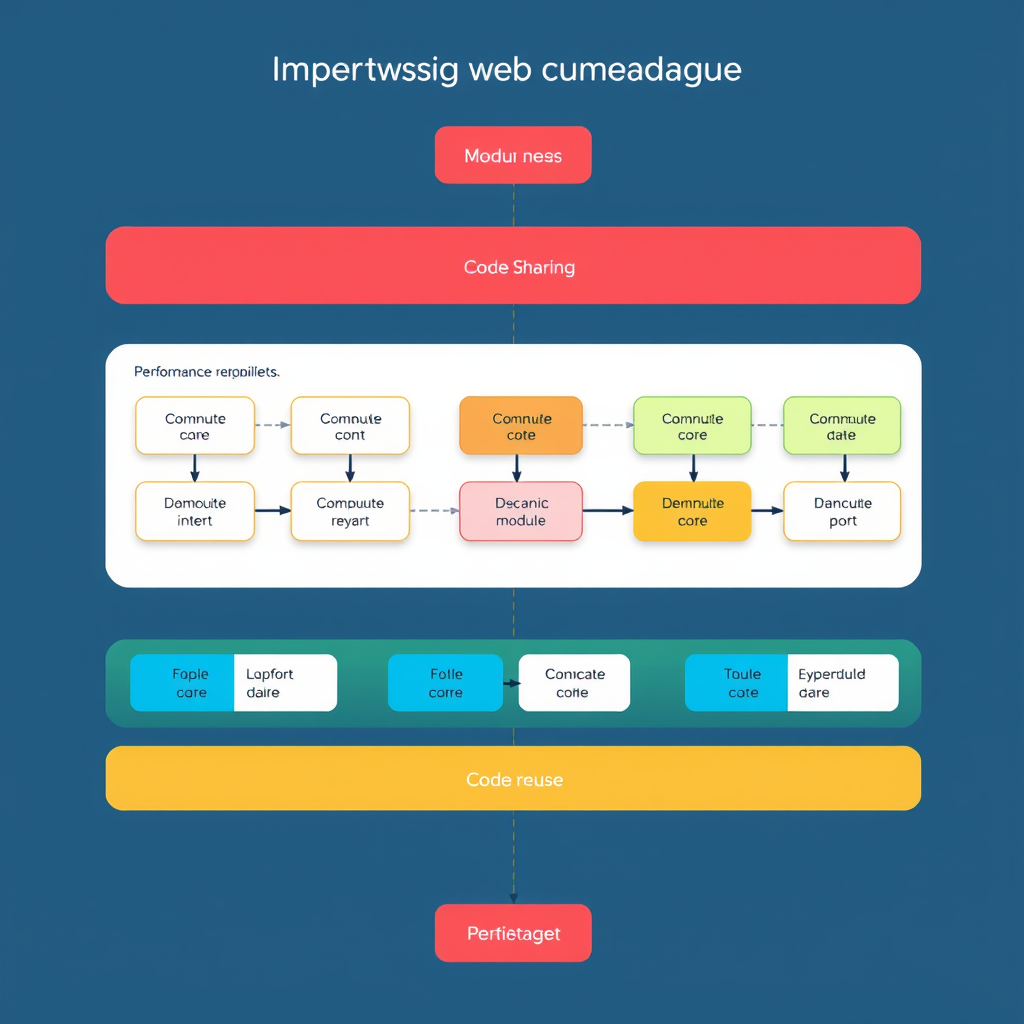
    Web Packaging and Module Federation: Modern Frontend Architecture for Code Sharing and Performance

    Web packaging and module federation represent the evolution of frontend architecture, moving beyond traditional bundling approaches to enable true code sharing and dynamic module composition across distributed applications.

    What Is Web Packaging?

    Web packaging is a fundamental shift in how we think about serving and consuming web assets. Instead of monolithic bundles that contain all application code, modern web packaging focuses on delivering fine-grained, versioned modules that can be efficiently cached and reused across different applications and domains.

    Traditional bundling methods like Webpack create single large JavaScript files that contain every module your application needs. While effective, this approach leads to duplicated code, longer initial loads, and limited opportunities for sharing between applications.

    Enter Module Federation

    Module Federation is a revolutionary technique that allows different applications to share modules at runtime without needing to bundle them together. Think of it as microservices for frontend code—each application can provide some capabilities while consuming others from neighboring applications.

    With Module Federation, a banking app might share its authentication module with a dashboard application, or multiple e-commerce sites could share a product catalog component. This eliminates code duplication and creates opportunities for truly modular frontend architectures.

    Key Benefits of Module Federation

    • Code Reusability: Share components and utilities across multiple applications
    • Reduced Bundle Sizes: Applications only load the modules they actually need
    • Faster Development: Teams can work on shared modules independently
    • Runtime Flexibility: Applications can discover and consume modules dynamically
    • Better Caching: Shared modules benefit from aggressive browser caching

    Technical Implementation

    Implementing Module Federation requires careful setup and configuration. The host application exposes its available modules through a special federation configuration, while remote applications advertise the modules they provide. At runtime, applications can remotely load and consume these shared modules.

    Modern frameworks like React, Vue, and Angular all support Module Federation, but the implementation details vary. Most solutions use JSON configuration files to define which modules are exposed, the format they’re exposed in, and how they should be loaded by consumers.

    Common Use Cases

    Module Federation shines in specific scenarios. Monorepos with multiple frontend applications can share UI components, micro-frontends can collaboratively build larger applications, and organizations can create shared toolkits that standardize component usage across teams.

    For example, a retail company might have a product search module that powers multiple e-commerce sites. By federating this module, each site can benefit from improvements and bug fixes made to the central module without redeploying their entire application.

    Best Practices for Success

    While powerful, Module Federation introduces complexity that must be carefully managed. Version compatibility is crucial—different applications using different versions of the same module can lead to runtime errors. Additionally, network latency becomes more important since applications must make cross-origin requests to load shared modules.

    Start with a clear governance model and establish naming conventions for shared modules. Monitor module usage and performance carefully, as the distributed nature of federation can introduce new failure points. Consider implementing fallback mechanisms for scenarios where shared modules aren’t available.

    The Future of Web Packaging

    Web packaging and Module Federation are still evolving technologies, but their potential is undeniable. As browsers continue to improve module support and standards bodies work on formalizing these approaches, we can expect even more powerful capabilities for building the next generation of web applications.

    The future likely includes better support for server-side module federation, enhanced security models for cross-origin module sharing, and tighter integration with modern JavaScript standards like ES Modules and Web Components.

    By embracing web packaging and Module Federation today, organizations can position themselves at the forefront of frontend innovation, creating applications that are more modular, performant, and maintainable than ever before.

  • Modern WordPress Security: A Complete Implementation Guide

    Modern WordPress Security: A Complete Implementation Guide

    Modern WordPress Security: A Complete Implementation Guide

    In today’s digital landscape, WordPress powers over 40% of all websites, making it a prime target for cyber attackers. While WordPress itself is secure by default, proper implementation of security measures is crucial to protect your site, your users, and your reputation. This comprehensive guide covers everything from basic security hygiene to advanced threat prevention strategies.

    1. Essential Security Foundations

    Before implementing advanced security measures, establish these fundamental security practices:

    Keep Everything Updated

    Regular updates are your first line of defense:

    • Update WordPress core to the latest version immediately when released

    • Keep all plugins and themes updated to their latest versions

    • Use automatic updates for minor releases when appropriate

    • Monitor the WordPress security announcements for critical vulnerabilities

    Use Strong Authentication

    Implement robust authentication mechanisms:

    • Use complex passwords (minimum 12 characters with mixed case, numbers, and symbols)

    • Enable two-factor authentication (2FA) for all user accounts

    • Limit login attempts to prevent brute force attacks

    • Use plugins like WP Fastest Cache’s security features or separate 2FA solutions

    2. Advanced Security Implementation

    Once foundations are secure, implement these advanced security measures:

    Implement SSL/TLS Certificates

    HTTPS is now a security requirement, not a luxury:

    • Obtain and install SSL certificates from reputable providers

    • Configure HTTP Strict Transport Security (HSTS)

    • Ensure all site resources load over HTTPS

    • Implement certificate pinning for added security

    Database Security

    Your WordPress database contains sensitive information that requires special protection:

    • Use unique, strong database passwords

    • Change the default database prefix to something non-standard

    • Implement database backups using plugins like UpdraftPlus or BackupBuddy

    • Consider using WordPress Multisite for better security isolation

    3. Security Headers Implementation

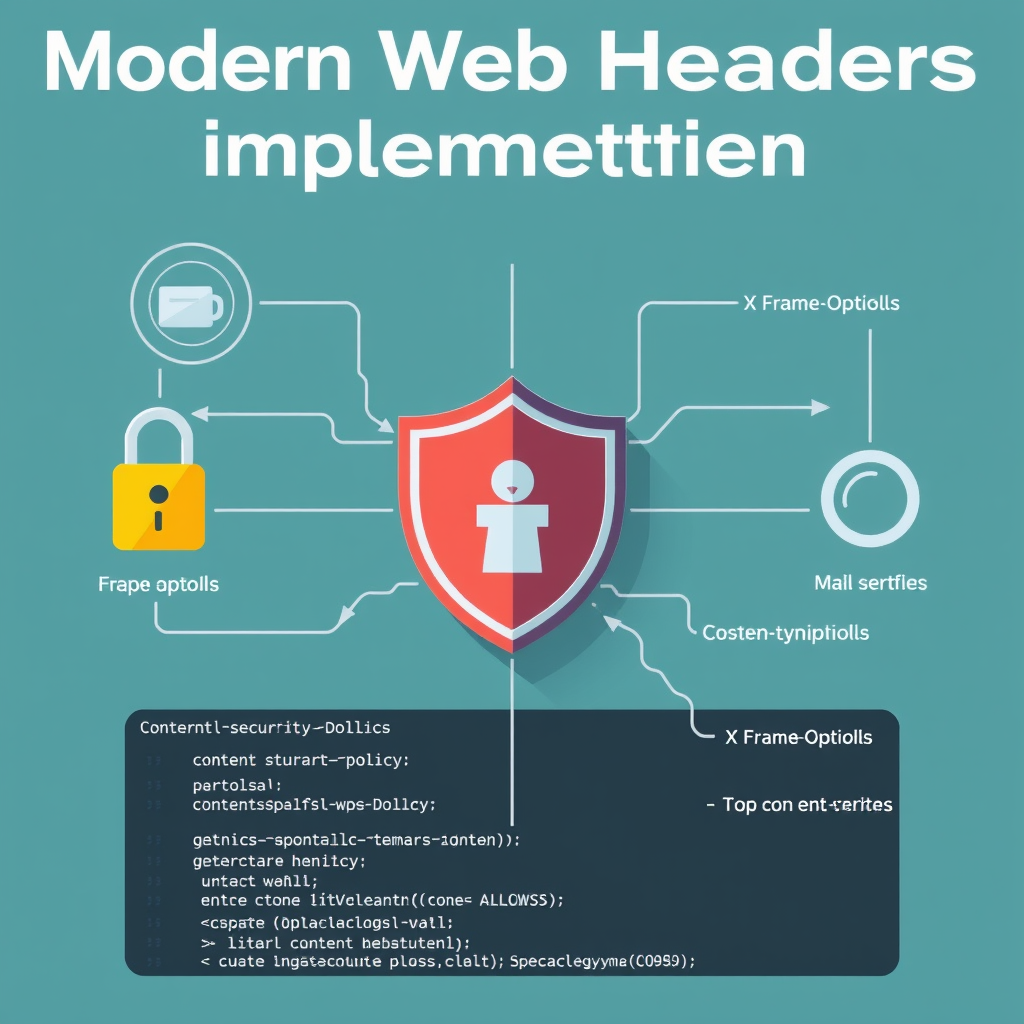
    Security headers are essential for modern WordPress security. Implement these key headers to protect your site:

    Content-Security-Policy (CSP)

    The Content-Security-Policy header is crucial for preventing XSS attacks in WordPress:

    • Define strict rules for resource loading to prevent malicious scripts

    • Use nonces and hashes for inline scripts and styles

    • Configure WordPress-specific CSP rules

    • Test CSP implementation with your WordPress theme and plugins

    X-Frame-Options

    Prevent clickjacking attacks by controlling how your site can be embedded:

    • Set to DENY or SAMEORIGIN for maximum protection

    • Ensure compatibility with your WordPress admin interface

    • Test embedding behavior with third-party services

    • Consider using WP-CLI for bulk header management

    4. Threat Prevention and Monitoring

    Security is not just about prevention—it’s also about detection and response:

    Security Plugins and Tools

    Deploy comprehensive security solutions for WordPress:

    • Install reputable security plugins like Wordfence, iThemes Security, or Sucuri

    • Enable web application firewall (WAF) features

    • Use security scanners to identify vulnerabilities regularly

    • Implement file integrity monitoring

    Regular Security Audits

    Conduct systematic security assessments for WordPress:

    • Perform vulnerability scans monthly

    • Review access logs for suspicious activity

    • Test security configurations with penetration testing tools

    • Keep security plugin signatures updated

    5. User and Role Management

    Your users are often the weakest link in security—strengthen this through proper management:

    Principle of Least Privilege

    Implement the principle of least privilege for WordPress users:

    • Assign users only the permissions they absolutely need

    • Use role-based access control effectively

    • Review and revoke unnecessary permissions regularly

    • Separate administrative accounts from development accounts

    Session Security

    Protect WordPress user sessions from hijacking:

    • Implement session timeouts

    • Use secure cookies (HTTPOnly, Secure flags)

    • Rotate session IDs after login

    • Monitor for suspicious session activity

    6. Content Security and File Management

    Your site’s content can be a vector for attacks—implement proper content security:

    File Upload Security

    Control what gets uploaded to your WordPress site:

    • Restrict file types to only what’s necessary

    • Scan uploaded files for malware

    • Store uploaded files outside the web root when possible

    • Implement file upload size limits

    Content Injection Prevention

    Prevent malicious content from being injected into your WordPress site:

    • Use Content Security Policy (CSP) headers

    • Implement cross-site scripting (XSS) protection

    • Validate and sanitize all user input

    • Use secure coding practices in custom plugins

    7. Recovery and Business Continuity

    Even with perfect security, breaches can happen—prepare for them:

    Backup Strategies

    Implement comprehensive backup solutions for WordPress:

    • Perform daily automated backups

    • Store backups in multiple locations (offsite and cloud)

    • Test backup restoration regularly

    • Implement version control for critical site changes

    Incident Response Plan

    Create a structured response plan for WordPress security incidents:

    • Define clear roles and responsibilities

    • Create step-by-step response procedures

    • Establish communication protocols

    • Conduct regular drills and simulations

    8. Future-Proofing Your Security

    Security is an ongoing process—stay ahead of emerging threats:

    Continuous Education

    Stay informed about evolving WordPress security landscapes:

    • Follow WordPress security announcements and updates

    • Participate in security community forums

    • Attend security conferences and webinars

    • Read security research and threat reports

    Technology Evolution

    Leverage emerging security technologies for WordPress:

    • Explore AI-powered threat detection

    • Implement blockchain for identity verification

    • Use zero-trust security models

    • Consider security orchestration and automation

    Conclusion: Making Security Second Nature

    Modern WordPress security is not a checklist—it’s a mindset. By implementing these comprehensive strategies, you’ll create a robust security framework that protects your site today while preparing it for tomorrow’s challenges. Remember that security is an ongoing journey, not a destination. Start with the essentials, build upon them systematically, and never stop learning.

    The cost of a security breach far outweighs the investment in proper security measures. Take action today to protect your WordPress site, your users, and your digital presence. Your future self will thank you for the proactive approach.

  • Service Workers and Offline Capabilities: Building Resilient Web Applications

    Service Workers and Offline Capabilities: Building Resilient Web Applications

    Service Workers and offline capabilities represent a fundamental shift in how web applications handle connectivity challenges, enabling developers to create truly resilient applications that work seamlessly across different network conditions. As users increasingly expect instant access and uninterrupted experiences, understanding Service Workers becomes essential for modern web development.

    What Are Service Workers

    Service Workers are JavaScript files that run separately from the main browser thread, acting as programmable network proxies that sit between web applications, the browser, and the network. They operate on an event-driven model and can intercept network requests, cache resources, and serve cached responses when needed.

    The core magic of Service Workers for offline capabilities comes from their ability to cache resources during periods of connectivity and serve them when the network is unavailable. This happens through three primary cache strategies that form the foundation of offline-first web development:

    • Network first: Try network, fall back to cache if network fails
    • Cache first: Serve from cache, update in background when network is available
    • Stale while revalidate: Serve stale cache while checking for fresh data

    Implementing these strategies requires understanding the Service Worker lifecycle and event system. Here’s a practical example of how to set up a basic Service Worker with cache management:

    // Service Worker registration
    if ('serviceWorker' in navigator) {
        navigator.serviceWorker.register('/sw.js')
            .then(registration => {
                console.log('Service Worker registered successfully');
            })
            .catch(error => {
                console.error('Service Worker registration failed:', error);
            });
    }

    Installation and Activation

    When a Service Worker is registered, it goes through three distinct phases: registration, installation, and activation. Understanding these phases is crucial for managing caches properly.

    • Registration: The browser creates a Service Worker script instance
    • Installation: First-time setup, can skip waiting for activation
    • Activation: Takes control of the page, removes old versions

    The installation phase is particularly important for setting up initial caches. You can listen for the ‘install’ event and populate your cache during this time.

    self.addEventListener('install', (event) => {
        event.waitUntil(
            caches.open('static-cache-v1').then((cache) => {
                return cache.addAll([
                    '/',
                    '/index.html',
                    '/styles.css',
                    '/app.js'
                ]);
            })
        );
    });

    Practical Implementation with Cache Management

    Here’s a more comprehensive example of a cache management utility that you can use in your Service Worker:

    const cacheManager = {
        async createCache(cacheName) {
            return caches.open(cacheName);
        },
        
        async matchRequest(request, cacheName) {
            const cache = await this.createCache(cacheName);
            return cache.match(request);
        },
        
        async putRequest(request, response, cacheName) {
            const cache = await this.createCache(cacheName);
            return cache.put(request, response);
        }
    };
    // Use it
    const staticCache = await cacheManager.createCache('static-v2');
    await cacheManager.putRequest('/app.js', response, 'static-v2');
    const cachedResponse = await cacheManager.matchRequest('/app.js', 'static-v2');

    Browser Support and Future Trends

    Service Workers are supported across all major modern browsers, making offline capabilities a reliable feature for production applications. As the web evolves, we’re seeing exciting developments:

    • Background Sync API for offline form submissions
    • Periodic Background Sync for scheduled updates
    • Cache Storage API for more granular cache control
    • Network State API for better offline detection
    • Enhanced fetch event capabilities for complex caching strategies

    By embracing Service Workers and offline capabilities today, you create a more dependable experience that keeps users engaged and reduces frustration, ultimately driving better retention and conversion rates. The future of resilient web applications is already here, and Service Workers are leading the way.

  • Web Workers and Background Processing: Modern Web Performance Strategies

    Web Workers and Background Processing: Modern Web Performance Strategies

    Web Workers and background processing represent one of the most significant advancements in modern web development, allowing developers to perform heavy computational tasks without freezing the user interface. This guide explores how to leverage these capabilities to create responsive, high-performance web applications that can handle complex processing tasks in the background while keeping the main thread responsive to user interactions.

    Understanding Web Workers: The Basics

    Web Workers are JavaScript threads that run independently of the main browser thread, enabling parallel processing in web applications. Before Web Workers, long-running JavaScript operations would block the entire UI, causing the browser to become unresponsive. Web Workers solve this by moving heavy computational tasks out of the main thread, allowing the interface to remain responsive even during intensive processing.

    Types of Web Workers

    There are three main types of Web Workers, each serving different use cases:

    • Dedicated Workers: Run in a separate thread, ideal for CPU-intensive tasks like data processing, image manipulation, and complex calculations. These workers cannot communicate directly with the main thread.
    • Shared Workers: Can be shared across multiple windows/pages, perfect for scenarios like real-time analytics, shared caching, or coordinated background processes.
    • Service Workers: Operate at the network level, enabling offline functionality, background syncing, and intercepting network requests. These are particularly useful for Progressive Web Apps (PWAs) and offline-first strategies.

    When to Use Web Workers

    Not every task benefits from Web Workers. Here are the scenarios where they shine:

      CPU-intensive operations: Image processing, data visualization, cryptographic operations, file parsing, and complex mathematical calculations
    • Large dataset operations: Data filtering, sorting, transformation, and aggregation that would block the UI if run in the main thread
    • Real-time processing: Audio processing, video manipulation, physics simulations, and other time-sensitive computations
    • Background data synchronization: Uploading large files, API processing, and data transformation while keeping the UI responsive
    • Offloading to worker threads: Decomposing complex problems into smaller, parallel tasks that can be processed independently

    Web Workers are less suitable for tasks that complete quickly (under 50ms), I/O operations (which can be handled with async/await), or simple UI updates. In these cases, the overhead of creating and managing worker threads might outweigh the benefits.

    Real-World Implementation Examples

    Image Processing

    Image processing is one of the most common use cases for Web Workers. The following example demonstrates how to perform complex image manipulation without blocking the UI:

    // worker.js
    // self refers to the worker thread
    
    const worker = self;
    
    worker.onmessage = function(e) {
        const { imageData, operations } = e.data;
        
        // Perform complex image operations
        const result = processImage(imageData, operations);
        
        // Send result back to main thread
        worker.postMessage(result);
    };
    
    function processImage(imageData, operations) {
        // Complex image processing logic
        // This runs in a separate thread
        return modifiedImageData;
    }

    Data Visualization

    Creating interactive data visualizations often requires heavy calculations for positioning elements, computing scales, and rendering complex graphics. Web Workers can handle these computations while keeping the visualization responsive.

    // Create worker for data processing
    const dataWorker = new Worker('data-worker.js');
    
    dataWorker.onmessage = function(e) {
        const { processedData, chartConfig } = e.data;
        updateChart(processedData, chartConfig);
    };
    
    dataWorker.postMessage({
        data: largeDataset,
        chartType: 'scatter',
        dimensions: { width: 800, height: 600 }
    });

    Advanced Background Processing Strategies

    Chunking and Modularization

    For extremely large datasets, consider breaking tasks into smaller chunks to prevent UI blocking:

    function processLargeDataset(data, chunkSize = 1000) {
        const chunks = chunkArray(data, chunkSize);
        const worker = new Worker('processor.js');
        
        return chunks.map((chunk, index) => {
            return new Promise(resolve => {
                worker.onmessage = (e) => resolve(e.data);
                worker.postMessage({ chunk, index });
            });
        });
    }

    Service Worker Background Sync

    Service Workers enable powerful background synchronization capabilities, particularly useful for offline-first applications:

    // service-worker.js
    self.addEventListener('sync', (event) => {
        if (event.tag === 'background-sync') {
            event.waitUntil(
                fetch('/api/background-process')
                    .then(response => response.json())
                    .then(data => {
                        // Process data in background
                        return processDataInBackground(data);
                    })
            );
        }
    });

    Browser Compatibility and Considerations

    Web Workers have good browser support across modern browsers, but there are some important considerations:

      Feature Detection: Always check for worker support with `typeof Worker !== ‘undefined’`
    • Memory Management: Create and terminate workers as needed to avoid memory leaks
    • Performance Tuning: Consider worker size and complexity to optimize performance
    • Fallback Strategies: Implement graceful degradation for older browsers
    • Security Considerations: Workers can only access certain file types (same-origin policies)

    Alternatives to Web Workers

    While Web Workers are powerful, they’re not always the best solution. Consider these alternatives:

      OffscreenCanvas: For canvas-based operations, OffscreenCanvas can be used without blocking the main thread
    • SharedArrayBuffer and Atomics: For inter-thread communication without message passing overhead
    • WebAssembly: For CPU-intensive tasks that benefit from compiled code
    • Third-party Libraries: Libraries like Comlink can simplify worker communication

    Best Practices for Background Processing

      Minimize Worker Creation: Reuse workers when possible to reduce overhead
    • Optimize Message Passing: Use structured data transfer (Transferable objects) to reduce memory usage
    • Implement Proper Termination: Clean up workers when they’re no longer needed
    • Monitor Performance: Use browser devtools to monitor worker performance
    • Test Error Handling: Implement robust error handling and recovery mechanisms

    WordPress Integration Examples

    For WordPress site owners and developers, Web Workers can enhance various aspects of the user experience:

      Live Search Enhancement: Perform complex search operations in workers for faster, more responsive search results
    • Media Processing: Process uploaded images or videos without blocking the upload interface
    • Frontend Data Processing: Handle complex data transformations for dynamic content before rendering
    • Analytics Processing: Process large datasets for real-time analytics and reporting

    By leveraging Web Workers and background processing, WordPress developers can create more responsive, feature-rich experiences that deliver better performance without compromising user experience.

    Future Trends in Background Processing

    The future of background processing looks promising with several emerging technologies:

      WebAssembly Workers: Bringing compiled language capabilities to background processing
    • Enhanced Worker APIs: More powerful communication and synchronization primitives
    • AI/ML Processing in Workers: Running machine learning models in the background for intelligent features
    • Service Worker Evolution: More sophisticated background sync and caching strategies

    Embracing Web Workers and background processing today positions your web applications for the future, where responsiveness and performance are non-negotiable expectations for users.

  • Web Accessibility Best Practices for Modern Websites

    Web Accessibility Best Practices for Modern Websites

    Web accessibility (a11y) ensures websites work for everyone, including people with disabilities. This comprehensive guide covers practical strategies to make your site more inclusive and user-friendly.

    Why Accessibility Matters

    Accessible websites serve diverse users and improve overall user experience. Key benefits include:

    • Expanded audience reach
    • Better SEO performance
    • Legal compliance with WCAG guidelines
    • Improved user satisfaction

    Core WCAG Guidelines

    1. Perceivable Content

    Ensure all content is presented clearly:

    • Provide alt text for meaningful images
    • Add captions to videos and transcripts to audio
    • Maintain 4.5:1 minimum color contrast
    • Use clear, readable fonts

    2. Operable Interface

    Design for keyboard and assistive technology navigation:

    • Full keyboard accessibility (Tab, Enter, Space, arrows)
    • Clear focus indicators
    • Avoid color-only information
    • Reasonable time limits

    3. Understandable Content

    Create clear, predictable interfaces:

    • Simple, clear language
    • Consistent navigation
    • Predictable behavior
    • Orientation aids

    4. Robust & Compatible

    Ensure compatibility with assistive technologies:

    • Semantic HTML structure
    • Valid markup
    • Screen reader compatibility
    • ARIA only when necessary

    Implementation Checklist

    • Use semantic HTML elements (nav, main, article, section, heading tags)
    • Add descriptive alt text to images
    • Test with screen readers (NVDA, VoiceOver, JAWS)
    • Keyboard-only navigation testing
    • Color contrast verification
    • Logical focus order
    • Minimal, purposeful ARIA usage

    Testing Tools

    Incorporate accessibility testing into your workflow:

    • Lighthouse (Chrome DevTools)
    • WebAIM Screen Reader Test
    • axe DevTools extension
    • Colour Contrast Analyzer
    • HTML validators

    Success Examples

    Real-world implementations showing accessibility benefits:

    • Airbnb’s redesign led to 10% higher booking conversion
    • Spotify’s captions reached broader audiences
    • Federal government mandates WCAG 2.1 AA compliance

    Prioritizing web accessibility creates more inclusive, successful websites that serve all users effectively.

  • HTTP/2 Server Push and HTTP/3: Modern Web Performance Optimization

    HTTP/2 Server Push and HTTP/3: Modern Web Performance Optimization

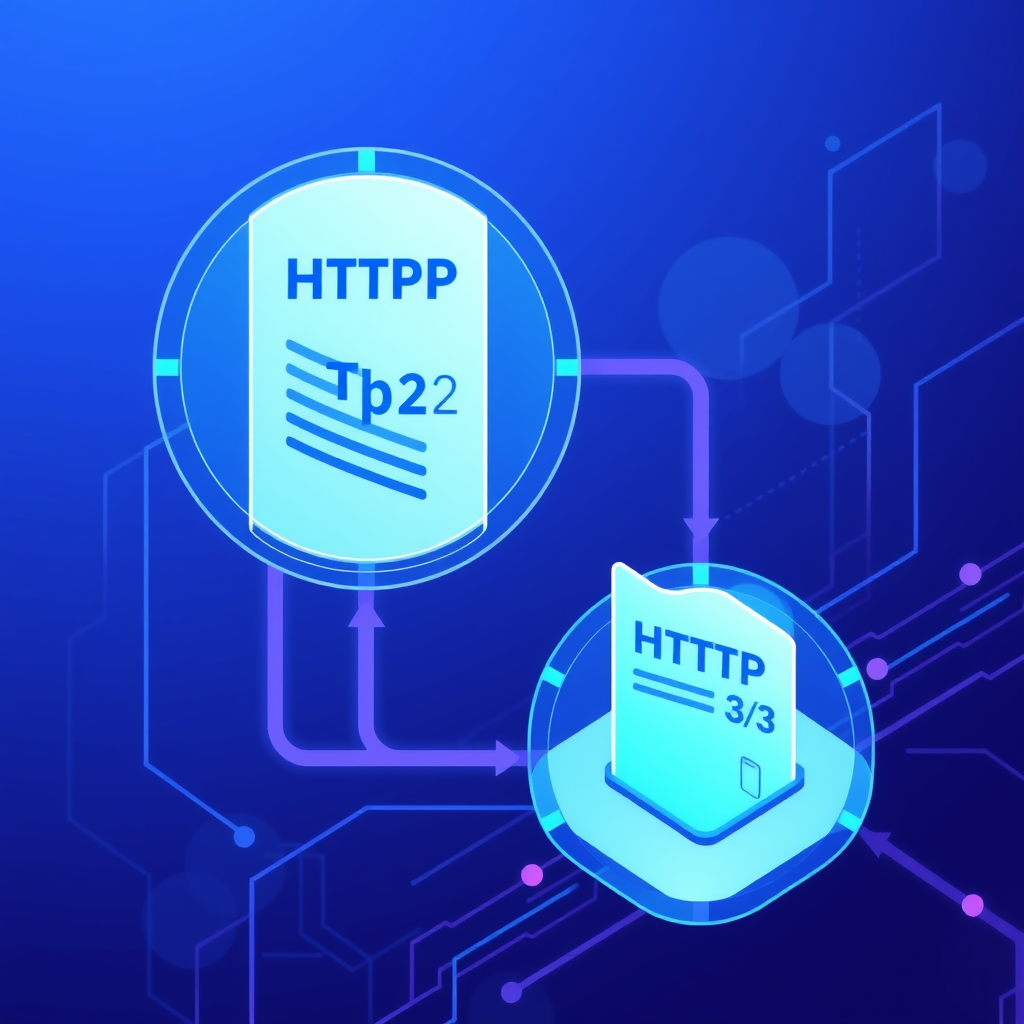
    Modern web performance optimization has evolved beyond traditional techniques like image compression and minification. With HTTP/2 and HTTP/3, we’re seeing revolutionary approaches that fundamentally change how content is delivered and cached between servers and browsers. These protocols represent the next generation of web performance optimization, offering significant improvements over the aging HTTP/1.1 standard.

    HTTP/2: The First Major Leap Forward

    HTTP/2, introduced in 2015, brought multiplexing to the web, allowing multiple requests and responses to be sent simultaneously over a single connection. This eliminates the notorious head-of-line blocking that plagued HTTP/1.1 and dramatically reduces latency for resource-heavy websites.

    Server Push: Pushing Content Before It’s Requested

    One of HTTP/2’s most innovative features is Server Push, which allows servers to proactively send resources to the client before they’re explicitly requested. This can significantly reduce round-trip times for critical resources like CSS, JavaScript, and fonts.

    However, Server Push must be used judiciously. Over-pushing can lead to bandwidth waste and cache pollution. Successful implementation requires understanding your application’s specific needs and carefully analyzing the typical resource requests for each page.

    HTTP/3: The Next Evolution with QUIC

    HTTP/3 takes the performance improvements even further by replacing TCP with QUIC, a UDP-based protocol that incorporates TLS encryption by default. This eliminates head-of-line blocking at the transport layer and provides better performance in lossy networks.

    Key Advantages of HTTP/3

    • Better Performance in Mobile Networks: QUIC’s multiplexed streams work better over high-latency mobile connections
    • Built-in Encryption: All HTTP/3 traffic uses TLS by default, improving security
    • Faster Connection Establishment: Zero-round-trip (0-RTT) connections for repeat visitors
    • Reduced Latency: No more TCP handshake delays

    While Server Push exists in HTTP/3, it’s implemented differently and is less commonly used due to the improved performance characteristics of QUIC itself.

    Implementation Strategies

    Server-Side Configuration

    Implementing HTTP/2 and HTTP/3 requires server configuration updates. Modern web servers like Nginx, Apache, and specialized services support both protocols. Content Delivery Networks (CDNs) often provide automatic HTTP/3 support.

    Client-Side Considerations

    Browsers have largely adopted HTTP/2 and HTTP/3 support. However, proper fallback mechanisms should be maintained for older browsers. Most modern browsers support HTTP/3 automatically when available.

    Performance Testing and Measurement

    Measuring the effectiveness of HTTP/2 Server Push and HTTP/3 implementation requires careful testing. Tools like Google PageSpeed Insights, WebPageTest, and Lighthouse provide insights into protocol usage and performance impact.

    Key metrics to track include Time to First Byte (TTFB), First Contentful Paint (FCP), Largest Contentful Paint (LCP), and Cumulative Layout Shift (CLS). These metrics help quantify the real-world impact of protocol upgrades.

    Future Considerations

    As HTTP/3 adoption continues to grow, it’s essential to consider long-term implications for your web infrastructure. Migration strategies should account for both performance benefits and potential compatibility considerations.

    The evolution from HTTP/1.1 to HTTP/2 to HTTP/3 represents a fundamental shift in how we think about web performance. While Server Push offers compelling benefits, the real magic lies in how these protocols work together to create faster, more efficient web experiences.

  • Container Runtime Optimization: Advanced Docker and Podman Techniques

    Container Runtime Optimization: Advanced Docker and Podman Techniques

    Container runtime optimization has become essential for developers and operations teams seeking to maximize efficiency, performance, and security in containerized environments. As container adoption continues to accelerate, mastering advanced Docker and Podman techniques separates high-performing organizations from the rest.

    Container Runtime Fundamentals

    Before diving into advanced optimizations, it’s crucial to understand the fundamentals that underpin container runtime performance. Container runtimes serve as the bridge between application code and the host operating system, managing container lifecycle, resource allocation, and isolation.

    The two most prevalent container runtimes today are Docker (which uses containerd under the hood) and Podman (a daemonless alternative). Both offer unique advantages, but understanding their architectures is key to optimizing performance for your specific use case.

    Advanced Docker Runtime Optimization

    Advanced Docker optimization begins with understanding your runtime configuration. Start by fine-tuning your Docker daemon settings through the daemon.json file, optimizing resource allocation, and configuring storage drivers for your specific workload patterns.

    Implement multi-stage builds to reduce image sizes and attack surfaces. Use .dockerignore files strategically to exclude unnecessary files, and consider using build caches to speed up development iterations. For production environments, use minimal base images like Alpine or distroless variants to keep your containers lightweight and secure.

    Resource Management

    Advanced resource management involves configuring cgroup limits, CPU quotas, memory limits, and swap settings to ensure optimal performance without over-provisioning. Use Docker’s built-in monitoring tools to track resource usage patterns and adjust configurations accordingly. Implement container memory limits and soft limits to prevent noisy neighbor problems in shared environments.

    Networking Optimization

    Optimize container networking by using custom bridge networks, configuring IPv6, and implementing network policies for security. Use Docker’s default proxy settings efficiently, and consider using multi-network setups for separating development, staging, and production environments. For high-performance needs, explore overlay networks and configure them with proper subnet allocation.

    Advanced Podman Techniques

    Podman offers a daemonless container runtime that provides enhanced security and simplified management. Master Podman’s advanced features like rootless containers, pod management, and integration with CRI-O for Kubernetes compatibility.

    Implement pod-based deployments to manage related containers as single units, making scaling and management more straightforward. Use Podman’s build module for creating optimized images, and leverage its compatibility with Docker Compose files for seamless workflow integration. For production, configure Podman’s systemd integration for robust service management.

    Security Hardening

    Advanced security involves configuring SELinux policies, implementing user namespaces, and using trusted builds. Podman’s rootless mode provides enhanced security by running containers without root privileges. Use podman build with –security-opt flags to control container security parameters, and regularly scan images with tools like Trivy or Clair for vulnerabilities.

    Runtime Monitoring and Validation

    Validate runtime optimizations through systematic testing:

    • Benchmark container startup times before and after optimization
    • Measure resource consumption under load testing
    • Test failover and recovery scenarios
    • Validate performance consistency across multiple containers
    • Stress test resource limits to identify optimal configurations

    Document test results and create performance baselines to measure future optimization efforts against. Use tools like cAdvisor, Prometheus, and Grafana for comprehensive monitoring and alerting on container runtime performance.

    Future-Proofing Your Container Runtime

    As container technology evolves, stay ahead of the curve by:

    • Keeping runtime components up-to-date with security patches
    • Exploring emerging runtime technologies like containerd integration
    • Implementing runtime-agnostic deployment strategies
    • Building expertise across multiple container runtimes
    • Participating in container runtime communities and testing new features

    Continuous learning and adaptation ensure your container runtime remains optimized as technology advances and workload requirements evolve.

    By mastering these advanced Docker and Podman optimization techniques, you can achieve significant improvements in container performance, security, and operational efficiency. The key is to understand your specific workload requirements and apply targeted optimizations rather than using a one-size-fits-all approach.

  • WebAuthn and Passkeys: Modern Passwordless Authentication

    WebAuthn and Passkeys: Modern Passwordless Authentication

    WebAuthn (Web Authentication) and passkeys represent the next evolution in internet authentication, moving us beyond traditional username-password combinations toward more secure, convenient, and phishing-resistant methods of verifying identity online. This is fundamentally changing how we think about digital security while dramatically improving the user experience.

    The Evolution Beyond Passwords

    For decades, passwords have been the cornerstone of online authentication. However, they come with significant drawbacks: users struggle to remember complex passwords, reuse them across multiple sites, and they’re vulnerable to phishing, brute force attacks, and data breaches. WebAuthn and passkeys address these fundamental security flaws by leveraging public-key cryptography and biometric authentication.

    Understanding WebAuthn

    WebAuthn is a W3C standard that enables websites to authenticate users using public-key cryptography instead of passwords. It works by creating a cryptographic key pair for each website:

    • Private Key Storage: The private key is securely stored on the user’s device (smartphone, security key, or computer)
    • Public Key Registration: A public key is registered with the website during account creation
    • Biometric Authentication: Authentication requires the user to prove possession of the private key using a gesture (biometric or PIN)
    • Cryptographic Verification: The public key cryptographically verifies the user’s identity without transmitting the private key

    The beauty of WebAuthn lies in its simplicity: users authenticate with their existing biometric methods (fingerprint, face recognition) or a PIN, while websites can verify identity without ever seeing a password.

    What Makes Passkeys Different

    Passkeys take WebAuthn a step further by simplifying the user experience. Instead of manually selecting a platform (web, mobile, security key), passkeys automatically use the best available method on the user’s device. They work seamlessly across platforms and eliminate the need for users to understand the technical differences between authentication methods.

    Implementation Best Practices

    • Start with a smooth first-time registration experience that requires minimal user effort
    • Provide clear instructions for users unfamiliar with passwordless authentication
    • Consider fallback mechanisms for edge cases (like when biometric sensors fail)
    • Implement proper error handling and user feedback throughout the authentication flow
    • Support multiple authentication methods to accommodate different user preferences and device capabilities

    The Future of Authentication

    WebAuthn and passkeys represent just the beginning of passwordless authentication. As adoption grows, we are likely to see:

    • Universal Passkeys: Seamless authentication across all devices and platforms
    • Zero Trust Integration: WebAuthn as a foundation for broader identity frameworks
    • Multi-Factor Evolution: WebAuthn combined with contextual factors for enhanced security
    • Enterprise Integration: WebAuthn adoption in corporate environments
    • Decentralized Identity: WebAuthn working with blockchain-based identity solutions

    Conclusion: Moving Beyond Passwords

    WebAuthn and passkeys are transforming online authentication by providing a secure, convenient, and phishing-resistant alternative to passwords. As browser support and user awareness continue to grow, passwordless authentication is becoming the new standard for modern web applications. The transition promises to make the internet safer while dramatically improving the user experience—eliminating the password fatigue that has burdened users for decades.

    The adoption of WebAuthn and passkeys represents one of the most significant security improvements in the history of the internet. By removing passwords from the equation, we eliminate an entire class of vulnerabilities including credential stuffing, phishing, and password reuse attacks. At the same time, users enjoy a frictionless experience where they can authenticate with their natural biometric methods rather than memorizing complex secrets.